Welcome to the world of simple and easy recipes...

We, the ‘aakrantham crew’ extend our special greetings to the beginners in cooking, the novice Bachelors, suffering husbands for being the guinea pig of wife’s culinary experimentations and the most sophisticated cooking experts who, out of their intricate and above-average try-outs have forgotten their beginning point in cooking. Yes! Our aim is to show the simplified paths of cooking, to depict the formulae for day-to-day needs to kill the hunger, to help out someone who is completely new to kitchen and those whose breaths stop hearing the name of dishes with words like ‘forelle’, ‘pecam’, ‘oreo’, ‘agua’ e.t.c in it.

Almond (3) Apple (1) Arabic (1) Banana (1) Beef (3) Biriyani (1) Boiled (1) Brinjal (1) Broccoli (1) Burji (1) Cake (1) Calicut (2) Cassava (1) Chammanty (1) Chicken (9) Chilly (4) Chinese (2) Chutney (1) Coconut (7) Crab (1) Curry (7) Cutlet (1) Dessert (5) Dry Fry (6) Egg (5) Fish (5) Fruit (2) Gravy (12) Health Tip (1) Hot (8) Indian (28) Irachy Varattiyath (1) Kadukka (1) Kadumanga (1) kallumakkaya (1) Kappa (1) Karimeen (1) Kerala (31) king fish (1) Kitchen (26) KoottuCurry (1) Kozhikkodan (2) Mackerel (2) Malabar (17) Mathy (3) Mayonnaise (2) Meen Curry (2) Mushroom (1) Mutton (1) My Recipe (9) Naadan (18) Non Spicy (13) Non veg (14) Noodles (1) Pearl Spot (1) Pepper (3) Potato (1) Pudding (2) Salad (1) Samosa (1) Sardine (2) Sea Food (6) Shallot (2) Snacks (1) Snapper (1) Spicy (15) Sugar (4) Sweet (7) Tamarind (1) Tapioca (1) Thoran (1) Tomato (1) Traditional (14) Upperi (1) Urulakkizhang (1) vanilla (1) Vegetable (7) Vegetarian (9) Vegit (1) Yoghurt (1)

Tuesday, 23 August 2011

Spicy Squid Masala (Koonthal masala)


The special attraction of today’s fish purchase was squid. Though I went with Aneesh to buy fish for his household, he told Nimmy (his wife) used to cook squid only in continental style and not aware of traditional recipe and thus he discouraged me from buying.  But I assured him that I’ll guide her to make, trying to recollect all lessons learned during my PG studies. To be frank, I was really eager to try it out once. I hoped Nimmy won’t have to kick me out of her kitchen. Straight away from market, I went to help her in kitchen, started cleaning squid and gave the instructions to Nimmy as below to prepare traditional koonthal masala.


Ingredients:

Koonthal – 250 g
Red chilli powder – 2 teaspoon
Kashmiri chilli powder – 1 tea spoon
Turmeric powder – ½ teaspoon
Salt – to taste
Grated coconut – 2 Tb spoon
Chopped onion – 1 big sized
Tomato cut into small pieces– 1 medium sized
Green chilli – 2 no.s
Ginger, garlic (crushed) – 1 teaspoon
Coriander, mint leaves – 1 Tbspoon
Garam masala – 2 pinch
Coconut Oil – to fry


How to:

1.       Clean the squid well and cut it into round pieces. Mix chilli powders, turmeric powder and salt in a pan and cook for around 10 minutes in medium flame without adding water. Once the water in squid is drained completely, add coconut oil into the pan to fry the squid. Squid just need to be shallow-fried. So just 2 Tb spoon of oil will be enough.
Drain oil and keep the fried squid aside, once it is half-fried.
2.       In the same pan and same oil put chopped onion, green chilli, garlic and ginger and fry until softened. Pour extra oil only if it’s needed. Add cut coriander and mint leaves and garam masala. Add salt as needed and if it needs to be spicier, add ½ teaspoon pepper powder.  Add the cut tomato and fry till tomato is softened. Add the grated coconut and fried squid into this mixture and blend well for 2 minutes in medium flame.
3.       Serve hot in a plate, garnish with tomato and green chilli.

Note: It’s an ideal spicy side dish for any rice varieties or pathiris/breads/chapathis.

Nimmy made chappathi and we three had it with koonthal masala. I could figure out a smile on Aneesh’s face with a satisfaction that the money spent for squid didn’t go waste because of me... You too try this and comment about your opinions.

Monday, 22 August 2011

Unnakkai (Vaazhakkada/kaayada)


After trying out the recipe of ‘paalu vazhakka’, my friend called to thank me and tell that the dish was easy to make and delicious. As I’d given enough build-up about Malabar-snacks to her over the phone, she asked me for the recipe of ‘unnakkai’ J. Oh my God! I thought for a while and told her – “err...hmm...I don’t remember exactly, I mean I’ve a doubt in how do we make the stuffing for it. Is it fine if I recall and post it in blog?” She laughed and told – “Yea. It’s fine. You ask to someone and get the recipe. I’ll take from your blog”. Soon after cutting her call, called my mom and tuned her up with sweetest talks and tactfully got the recipe from her. I’m posting that recipe here for You...

Ingredients:

Plantain (ripe but stiff) – 3
Egg – 2
Sugar – ½ cup
Chopped cashew nuts – 3 Tbspoon
Raisins – 2 Tbspoon
Cardamom – 2
Ghee – 1 Tb spoon
Oil – for deep fry


How to:

1.       Steam or pressure cook the plantains till softened
2.       Peel off the skin from the cooked plantains and mash well with hand or in a mixer without adding water. If the mashed plantain is over-wet or shaky, roll it in a piece of cotton cloth for some time till it gets dried up.
3.       In a bowl mix egg, cashew nuts, raisins with sugar and mashed cardamom, well with continuous beating with a spoon.   
4.       In a pan, heat ghee and add the above mixture and stir well with a thin spoon for few minutes until the small egg pieces are separated from the pan.
5.       Spread some oil in your palm and take small balls from the mashed plantain, flatten the center a little with fingers and fill the egg mixture. Roll the plantain balls into a spindle’s shape.  (if the plantain balls are too sticky, add a little maida/rice flour into it or spread on palm so that it’ll be easy to shape)
6.       Deep fry these in hot oil in a pan till it turns brown.

Serve hot with tea. It’s one of the best choices for evening snacks.


Note: In ‘Paaluvazhakka’, instead of putting cut banana pieces, if unnakkai is added, it’ll be even yummier..!! Have a try?


Sunday, 21 August 2011

Chicken Samosa - Malabar Recipe


I bet no cuisine in the whole world can beat the traditional Malabar snacks’ taste. The ‘kozhikodan samosa’ is amongst the executive committee members of these snacks family.  It’s an essential item on any iftar table and the most sought morning and evening tea-time snack for all in Kozhikode. I took the recipe of the same recently from a friend of mine. Are you ready for a try with me?


How To:
For filling:
Boneless chicken – 250 gm
Chicken masala – 1 Tbspoon
 
Boil the washed chicken pieces with chicken masala and salt with a half cup of water till chicken is properly cooked. Drain the water if any, and mince the chicken.

Cooking oil – 2 Tbspoon
Onion - 2
Garlic (cut into small pieces) - 2
Green chilli (finaly diced) - 1
Mint, coriander & curry leaves (chopped) – 1 Tbspoon
Ginger (cut into small piece) – ½ teaspoon
Chicken Masala - 1½ Tbspoon
Chilly powder – ½ teaspoon
Turmeric Powder – ¼ teaspoon
salt - to taste


Heat the oil in a frying pan, add onion,green chilli, mint, coriander and curry leaves, ginger and garlic and fry until soft. Add chicken masala, chilli powder, turmeric powder and salt and mix well. Fry for few minutes.  Add the minced chicken and stir until mixed well. Chicken masala filling is ready.


for covering:
 
Maida - 225gm.
Rava – 2 Tb spoon
Salt – to taste
Cooking oil – 2 Tbspoon

Mix flour and salt into a bowl. Make a well into the centre and add the oil and enough warm water to make firm dough. Press the dough on a flat surface until smooth. Divide the dough into small balls and roll out the balls to bigger circles. Cut the circle into four equal pieces with a knife. Wet the longer edge with a little water with fingers and form a cone shape around your fingers, sealing the dampened edge.

Fill the cases with a Tbspn of your chicken masala filling and fold the opened corner to seal the top of the cone so that a triangular shape is made.


Deep fry the samosas in hot oil until crisp and brown take out and drain on a paper towel.

Delicious Malabar Samosa is ready to be served

Thursday, 18 August 2011

Paalu Vazhakka | പാലു വാഴക്ക - Dessert (Malabar Special)


 It’s iftar time at Monty’s home. The table is filled with so many tempting Malabar dishes.  The sweet dish which his sister served into my plate reminded me of my childhood days, having ‘paalu vazhakka’ from my Aunty’s home at Calicut. Its taste still lingers to my taste buds with a sweet nostalgia. I confirmed with her whether this dish is also the same and took the recipe from her. Sharing it here for you. Have a try....

Paalu vazhakka


Ingredients:
Sago rice ( sabudana/ചവ്വരി ) – 1 cup
Sugar – to taste
Cardamom – 2
Banana – big 2
Coconut (grated) - 1
Ghee – 2  teaspoon
Cashew nuts and dried grapes – 10 each
Small onion – 2


 How to:


1.       Put the grated coconut into a mixer jar, pour water just enough to dip the coconut and mix well. Squeeze this mixture to take thick coconut milk. The squeezed coconut milk should again be put in the mixer with more water and squeezed to take thin coconut milk. Keep both thick and thin milk separately in bowls.


2.       Boil the thin coconut milk and add the sago rice (without washing) into the boiling milk. Keep in low flames for 3 minutes. Slice the banana in a semi-diagonal angle into medium sized pieces and put these into the boiling sago rice. Close the vessel after switching off the flame.  Keep it closed for 10 minutes


3.       Open the vessel and add the thick coconut milk, required amount of sugar and mashed cardamom and boil in low flames for 2-3 minutes and switch off. Make sure that the dish came out in a comparatively thick consistency.


4.       Melt ghee in a small pan and roast small onion till getting brown and add cashew nuts and dried grapes. Roast it for few minutes.


5.       Serve ‘paaluvazhakka’ as prepared in step 3 and decorate with the roasted nuts n grapes. It’s a real tasty sweet that the taste will stick on to our tongue for days together.


Wednesday, 17 August 2011

Chicken Stew - Malabar Traditional


That’s fabulous! To hear from Jasna that her trial on chilli chicken was impressive. Now I’m really in a trap. I don’t think she’ll release me so soon from the post of her ‘cooking Guru’. The dedication series to Entry level cooks continues....

This time I’m here with an easy chicken curry recipe as she is more interested now in curries. Let’s try chicken stew? There is not much difference from Traditional Beef stew. Please follow the trailing instructions.   

Ingredients

Chicken (with bone) – ½ kg
Potato (peeled and cut into medium size) – 2 small sized
Green chilli (sliced) – 10-15 no.
Fenugreek – ¼ teaspoon
Onion (chopped) – ½ small sized
Ginger - 1 small piece
Coriander/mint/curry leaves chopped – 2 Tb spoon full
Grated coconut – 1
Curd – 1 Tb spoon
Salt to taste
Tomato – 1

How to:

1.       Put the grated coconut into a mixer jar, pour water just enough to dip the coconut and mix well. Squeeze this mixture to take thick coconut milk. The squeezed coconut milk should again be put in the mixer with more water and squeezed to take thin coconut milk. Keep both thick and thin milk separately in bowls.
2.       Put washed and cut chicken into an open vessel. Add potato, green chilli, minced ginger, coriander, fenugreek, mint and curry leaves cut into small pieces, curd and salt. Mix these ingredients well with hand and pour two cups of water. Boil it till chicken get properly cooked.
3.       Put the cut tomato into it and boil in low flame for 3 minutes. Add the thin coconut milk into this and boil for 5 minutes.
4.       Pour the thick coconut milk and mix. Simmer for 1-2 minutes. Switch off the flame.

Note:  depending on the piquancy of the green chillies, the count can be increased or decreased. And if needed, can be adjusted with a little amount of ground pepper also. Also to adjust thickness, one or teaspoon of corn flour can be mixed with some water and poured in to the curry while boiling.

Thus the easy and scrummy chicken stew is ready.

Tuesday, 16 August 2011

Chilly Chicken - My Version


 Jasna called in telling that she is going to give iftar day after tomorrow for her tuition students and she wants to try some different chicken curries for the same. Being a Hotel management graduate brother I did not have any other go other than nodding my head for her request. I asked her to check my blog for the next recipe post to get some chicken curry selections.

I was thinking which chicken formula I should reveal for such entry level cooks, who is sitting idle at home after finishing off their graduation and wanna slay their time by killing the great innovative art ‘cooking’..!! Anyhow my chilli chicken recipe is here, dedicated for such entry level cooks.

Chilli chicken (without ajinomoto)

Ingredients:

Chicken – ½ kg
Soya sauce – 2 ½ Tb spoon
Chilli Sauce – 2 ½ Tb spoon
Vinegar – ½ tea spoon
Capsicum green – 1 medium sized
Onion – 3 medium sized
Corn flour – 1 Tb spoon
Salt to taste
Sugar – 1/4  teaspoon
Spring onion and coriander leaves – to garnish
Oil – for frying

How to make:

1.       Mix ½ Tb spoon chilli sauce and ½ Tb spoon soya sauce well with chicken and keep this aside for 10 minutes. Boil this chicken with a half cup of water till chicken is half-cooked and drain water if any.

2.       Cut one onion into four equal parts and peel of the layers one by one. Pour one Tb spoon oil to a pan and fry this onion and capsicum which is cut into medium sized pieces till these are softened. Make sure that this is not over-fried.
3.       Cut two onions into thin slices and wash this after cutting (so that fried onion will be crispy). Pour oil into a pan just enough to deep fry this onion. Fry till dark brown and drain the onion from oil. Crush this fried onion with hands into small pieces.

4.       Add more oil into the same pan to deep fry the chicken mixture as in step1.  Drain the chicken pieces from oil after deep frying.

5.       Mix 2 Tb spoon soya sauce and 2 Tb Spoon chilli sauce in an open vessel. Dissolve 1 Tb spoon of corn flour into half cup of water and pour it to the mixture. Add a cup of water, vinegar, salt and sugar. Leave the mixture to boil. Once a thick enough gravy is made up, add the crushed onion as in step 3 and fried chicken as in step 4. Boil the mixture for some time and lower the flame. Add the onion and capsicum as in step 2 and keep in low flame for 3 minutes.

6.       Serve the gravy hot in a bowl and garnish with thin-sliced spring onion and coriander leaves cut into small pieces.

Yummy Chinese style chilli chicken is ready to be served with batura or any other Indian bread.


Monday, 1 August 2011

Apple Mayo Salad


As usual, the call with my sis went on for almost an hour. She shared so many routine stuffs, fun with her naughty kids, kitchen tensions, about the new mobile game to which she’s addicted so and so. She mentioned about the friends n family get together which she was going to attend the next day and the innovative dishes she’s going to prepare for it. But she was a bit confused about the salad part. No new idea came into her mind, she told. I suggested her to go for Apple Mayo salad and asked her to note down the recipe.

Apple Mayo Salad

Apple (peeled) – 2 medium sized
Almonds - 10-20 no.s
White Cabbage – 200 gms
Mayonnaise – 3 Tbspoon
Yoghurt                - 1 teaspoon
Salt – to taste
Sugar – ½ teaspoon

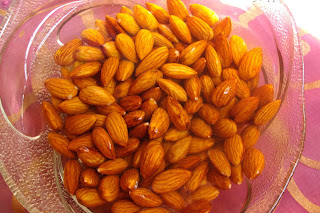
1.       Dip almonds in warm water for an hour and peel of the skin. Slice the almonds through its centre and make each into two pieces.
2.       Cut the peeled apple into small cube like pieces
3.       Take the layers of cabbage, remove the thick stem parts and cut the cabbage leaves into square pieces
4.       Mix the above three and add mayonnaise, yoghurt, salt and sugar to it. Mix it well.

It’s a delectable and easy salad, which can be served for any sociable gathering.


She tried it out and was so delighted to get the compliments from her friends. She didn’t forget to mention thanks to her lovely bro also.


Related Posts Plugin for WordPress, Blogger...

 
Design by Free WordPress Themes | Bloggerized by Lasantha - Premium Blogger Themes | Justin Bieber, Gold Price in India